Crispy Dosa Diagnostic Tool
Select the issue you are experiencing with your dosa to identify the likely cause and get specific solutions based on fermentation, batter consistency, and cooking technique.
Problem Identified
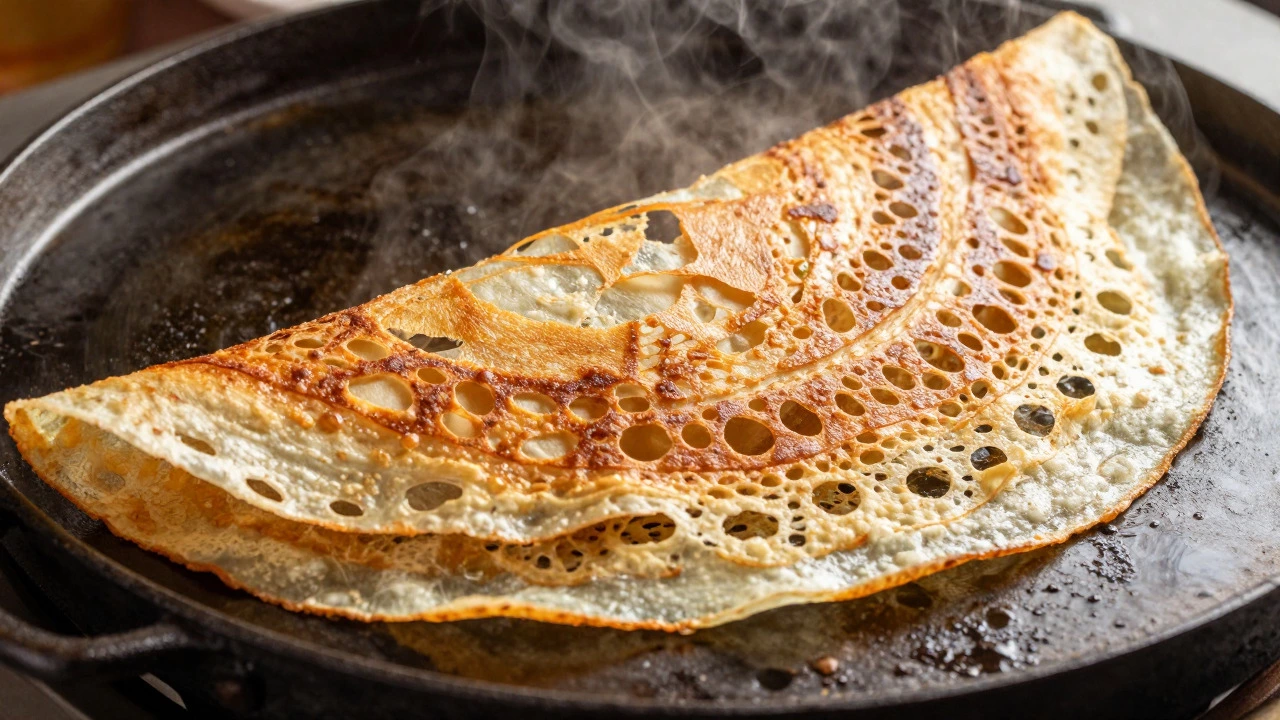
CriticalThere is nothing quite like the sound of a perfectly cooked dosa sizzling on a hot pan. That sharp crackle, followed by the sight of golden-brown lacy edges lifting away from the surface, signals success. But for many home cooks, that moment never comes. Instead, you get a soft, rubbery pancake that sticks to the pan or tears when you try to fold it. It’s frustrating, especially after hours of soaking, grinding, and fermenting your dosa batter is a fermented mixture of rice and urad dal (black gram) used to make South Indian crepes. You might be wondering if your grinder is broken, if your water is bad, or if you just lack the "touch." The truth is, a crispy dosa isn’t magic; it’s chemistry. If your dosa isn’t turning out crisp, one specific variable in your process is likely off. Let’s break down exactly why this happens and how to fix it, starting with the most common culprit: the batter itself.
The Fermentation Factor: Air Bubbles Are Key
If your batter looks flat and dense before you even pour it onto the pan, your dosa will never be crispy. Fermentation is not just about making the batter sour; it’s about creating structure. When yeast and bacteria in the batter eat the starches, they produce carbon dioxide gas. These gas bubbles expand during cooking, creating those signature holes and laces that allow moisture to escape, resulting in crispiness. If your batter hasn’t risen properly, the structure remains compact. Here is how to ensure proper fermentation:
- Temperature matters: Batter needs warmth to rise. In Auckland, where summers can be mild but winters are cold, your kitchen might be too chilly. Aim for a temperature between 25°C and 30°C (77°F - 86°F). If your kitchen is cooler, place the batter jar in an oven with just the light on, or wrap it in a thick towel and put it in a warm cupboard.
- Time is flexible: Don’t stick rigidly to a 6-hour rule. Check the volume. The batter should have increased in size by at least 1.5 times. If it hasn’t risen after 8-10 hours, it might need more time or a warmer spot.
- Don’t overmix: Once the batter has fermented, gently stir it to release excess acid if needed, but avoid vigorous whisking which deflates the precious air bubbles you worked so hard to create.
Rice-to-Dal Ratio: The Golden Balance
The ratio of rice to urad dal is split black gram lentils that provide protein and gluten-like elasticity to the batter is critical. Many beginners follow recipes blindly without understanding the function of each ingredient. Urad dal provides the binding and the fluffiness, while rice provides the crispness. If you use too much dal, your dosa will be fluffy but soft-more like a poori than a dosa. If you use too much rice, it might break apart easily. The standard ratio for a crispy masala dosa style batter is usually 3 parts rice to 1 part urad dal. For a thinner, crisper paper dosa, some chefs increase the rice ratio to 4:1 or even add poha (flattened rice) to the mix. Also, consider the type of rice. Short-grain varieties like Ponni or Sona Masoori are traditional because they absorb water differently than long-grain Basmati. Using the wrong rice variety can change the texture entirely, leading to a softer final product.
Batter Consistency: The Pour Test
This is perhaps the most overlooked factor. Your batter must be thin. Think of the consistency of heavy cream or buttermilk, not yogurt. If you dip a spoon into the batter and lift it, the batter should run off the spoon in a continuous, thin stream. If it drips in clumps, it’s too thick. Thick batter creates a thick layer on the pan. Heat cannot penetrate through a thick layer quickly enough to evaporate all the moisture before the outside burns. This results in a soggy center. To fix this, add ice-cold water gradually while stirring. Cold water also helps keep the batter cool, which prevents premature fermentation during the spreading process.
Pan Temperature and Type: Heat Management
You cannot cook a crispy dosa on a medium-low heat setting. You need high heat to trigger the Maillard reaction-the chemical process that browns food and creates complex flavors and crisp textures. However, "high heat" doesn’t mean burning oil. It means the pan must be thoroughly heated before you add any batter. Cast iron tawa is a heavy, flat griddle made of cast iron that retains heat exceptionally well, ideal for dosas is the gold standard. It holds heat uniformly. Non-stick pans are easier to clean but often don’t get hot enough or distribute heat as evenly, leading to patchy cooking. If you are using a non-stick pan, ensure it is preheated for at least 5 minutes on medium-high heat. Test the heat by sprinkling a few drops of water on the pan. If they sizzle and dance around immediately, the pan is ready. If they just sit there and evaporate slowly, it’s not hot enough.
The Spreading Technique: Thin and Fast
Even with perfect batter and a hot pan, your technique can ruin the crispiness. When you pour the batter, you have seconds to spread it. Hesitation leads to thicker patches. Use a ladle to pour the batter in the center, then immediately use the bottom of the ladle or your hand (if you’re experienced) to spread it in a circular motion, moving outward from the center. The goal is uniform thinness. Any thick spots will remain soft. Also, don’t press down on the dosa while spreading. Just let the batter flow. If you find yourself struggling to spread it thinly, your batter is likely too thick (see above).
Oil Usage: Less Is More
Here is a counter-intuitive tip: too much oil makes dosas soft. Oil acts as a barrier to heat transfer. If you drench the pan in oil before adding the batter, the batter steams rather than fries. For a crispy dosa, you want direct contact between the batter and the hot metal. Add a small amount of ghee or oil only around the edges after the dosa has started to set and turn golden. This seals the edges and adds flavor without preventing the main body from crisping up. Some traditionalists argue for no oil at all until the very end, relying solely on the pan’s heat.
Moisture Control: Covering vs. Uncovered
When should you cover the dosa? Covering traps steam. Steam makes things soft. If you want a soft, fluffy dosa (like a uttapam), cover it. If you want a crispy dosa, leave it uncovered for the majority of the cooking time. Only cover it for the last 30 seconds if you feel the top is still raw and the bottom is already golden. This brief burst of steam cooks the top without sacrificing the crunch of the bottom. Once you flip it (if you do), cook the second side uncovered to dry it out further.
| Problem | Likely Cause | Solution |
|---|---|---|
| Dosa is soft and chewy | Batter too thick or under-fermented | Add ice water to thin batter; ensure batter has doubled in volume. |
| Dosa sticks to the pan | Pan not hot enough or insufficient seasoning | Preheat pan longer; season cast iron with oil and heat. |
| No holes/laces forming | Lack of fermentation or incorrect rice type | Use short-grain rice; extend fermentation time in a warm spot. |
| Dosa breaks when folding | Too little urad dal or over-thin batter | Increase dal ratio slightly; ensure proper fermentation for elasticity. |
| Dosa is pale and soggy | Low heat or too much oil | Increase heat; reduce oil to just the edges. |
Ingredient Quality and Freshness
Finally, don’t underestimate the quality of your ingredients. Old rice or stale urad dal can affect absorption rates and fermentation potential. Always rinse your rice and dal thoroughly until the water runs clear to remove excess starch, which can make the batter sticky and less crisp. Soaking times matter too: rice generally needs 4-6 hours, while urad dal needs 2-3 hours. Over-soaking can make the dal mushy, affecting the grind texture. A coarse grind for the dal and a finer grind for the rice is often preferred for better texture control.
Can I use instant dosa powder?
Yes, but it rarely achieves the same level of crispiness as homemade fermented batter. Instant mixes lack the natural leavening agents produced during fermentation. To improve crispiness with instant mix, add a pinch of baking soda and ensure the batter is very thin.
Why does my dosa become soft after a few minutes?
This is usually due to ambient humidity or stacking the dosas while they are still hot. Steam gets trapped between the layers. Serve dosas immediately on a wire rack to allow airflow, or keep them in a warm oven (not covered) until serving.
Should I salt the batter before or after fermentation?
It is best to add salt after fermentation. Salt can inhibit the growth of yeast and bacteria, potentially slowing down or stopping the rising process. Add salt just before you start cooking.
Does the type of water affect dosa crispiness?
Hard water can sometimes interfere with fermentation. If you live in an area with very hard water, consider using filtered or boiled-cooled water for soaking and mixing the batter to ensure consistent results.
How long can I store dosa batter?
Fermented batter can be stored in the refrigerator for up to 5 days. As it ferments further in the fridge, it becomes more sour. You may need to adjust the taste with a pinch of sugar or baking soda if it becomes too acidic.