Creating rotis that are both soft and delectable is a quest for many cooking enthusiasts. The art lies in a few key practices that might seem simple, yet they make a world of difference. Whether you're a seasoned cook or a curious beginner, understanding the intricacies of soft roti-making can turn your kitchen into a culinary paradise.
The journey begins with selecting the right kind of flour, one that retains moisture yet allows for a tender texture. But flour is just the start. Hydration levels of the dough dictate its pliability, while proper kneading ensures an even texture that guarantees softness with every bite.
In addition, allowing the dough to rest is vital, giving the gluten strands time to relax and expand—a simple step that many overlook. And when it's time to cook, using the right technique will ensure your rotis puff up beautifully, maintaining their tenderness. Let's dive deeper into each of these aspects to transform your roti game.
- Choosing the Right Flour
- Importance of Dough Hydration
- Kneading Techniques for Softness
- Resting the Dough: Why It Matters
- Perfect Cooking Methods
- Common Mistakes and How to Avoid Them
Choosing the Right Flour
The quest for the softest, fluffiest roti begins with a seemingly mundane choice—the flour. Yet, within this choice lies the foundation that dictates the texture and flavor of your rotis. Whole wheat flour, also known as 'atta,' is traditionally used due to its perfect balance of fiber and gluten, providing both nutrition and the elasticity needed for an ideal dough. However, not just any whole wheat flour will do. Freshness matters immensely. Always opt for fresh, stone-ground flour when possible, as it's less processed and retains more natural nutrients and oils, which in turn affect the dough's moisture levels and texture.
Texture and consistency also play a key role in the flour you choose. A flour with high protein content is known for its ability to form gluten, creating dough that is stretchy and can trap air, crucial for achieving that sought-after puffiness in a soft roti. The quality of gluten affects how well the dough can be rolled out and how it holds its shape while cooking.
“Think of gluten as the skeletal structure of your dough,” says Emma Christensen, a food expert who emphasizes that understanding the role of gluten can elevate your bread-making skills from amateur to expert. “Soft, stretchy dough leads to soft and pillowy breads.”
So, what should you look for when buying flour? A good blend might consist of 70% fine whole wheat and 30% all-purpose flour. This combination creates a lighter dough without compromising on the traditional flavor. Some experienced cooks might also add a small portion of gram flour (besan) or even a tablespoon of ghee into the mixture to enhance softness. Exploring the world of flour combinations can be an exciting culinary adventure, allowing you to tweak the recipe to suit personal preferences while maintaining that perfect soft roti everyone loves.
Keep an eye on storage as well. Flour tends to lose its potency if stored improperly. It’s advisable to store it in airtight containers, away from light and moisture. A cool, dry pantry will extend its shelf life significantly. Regularly checking for freshness by observing any subtle changes in the scent or color can prevent the use of expired flour which could affect the quality of your rotis. This small but crucial step ensures every batch of dough starts with the best possible ingredients.
Importance of Dough Hydration
Hydration is the secret ingredient that can define the success of your roti making endeavor. It is not just about adding water to dry flour, but achieving the right balance that will lead to a beautifully soft roti. The sponge-like consistency in your dough is essential, as the water content helps in expanding the gluten molecules, making the dough pliable and easy to roll out. A well-hydrated dough means better moisture retention, which is paramount in making soft roti that stays tender long after it's cooked. Water quantities should ideally be 50% to 60% of the flour weight, which will allow for the most optimal texture.
A fascinating aspect of hydration is how it influences the feel of the dough against your fingertips. If you notice that it's slightly sticky but doesn't cling aggressively to your hands, you're on the right track. This indicates that the dough is well-hydrated, ensuring that it will be easier to manage and more forgiving when it comes to rolling out even, intact circles. However, too much water can turn your dough into a sticky mess, rendering it hard to salvage, while too little will make for dry rotis with edges that could rival a cracker's crunch. Striking that perfect hydration balance can be likened to a dance, one where flour and water waltz together in harmony.
"Achieving the perfect balance of hydration is akin to painting the ideal culinary masterpiece—each stroke or measure makes a tangible difference," says culinary expert Chef Meera Patel.
Experimenting with water temperature can also yield surprisingly positive effects. Warm water tends to aid in smoother hydration compared to cold water. This difference in temperature affects the overall texture by making the dough softer and easier to knead. Therefore, adopting the practice of slightly warm water (about 35°C) aids the kneading process and results in that elusive soft texture. For those who like precision, using a food scale to measure water ensures that you remain consistent with the hydration for every batch of dough you prepare. Getting in touch with this nuanced process embraces the mindful aspect of cooking—akin to losing oneself in the rhythm of nature, where precision meets patience.
Kneading Techniques for Softness
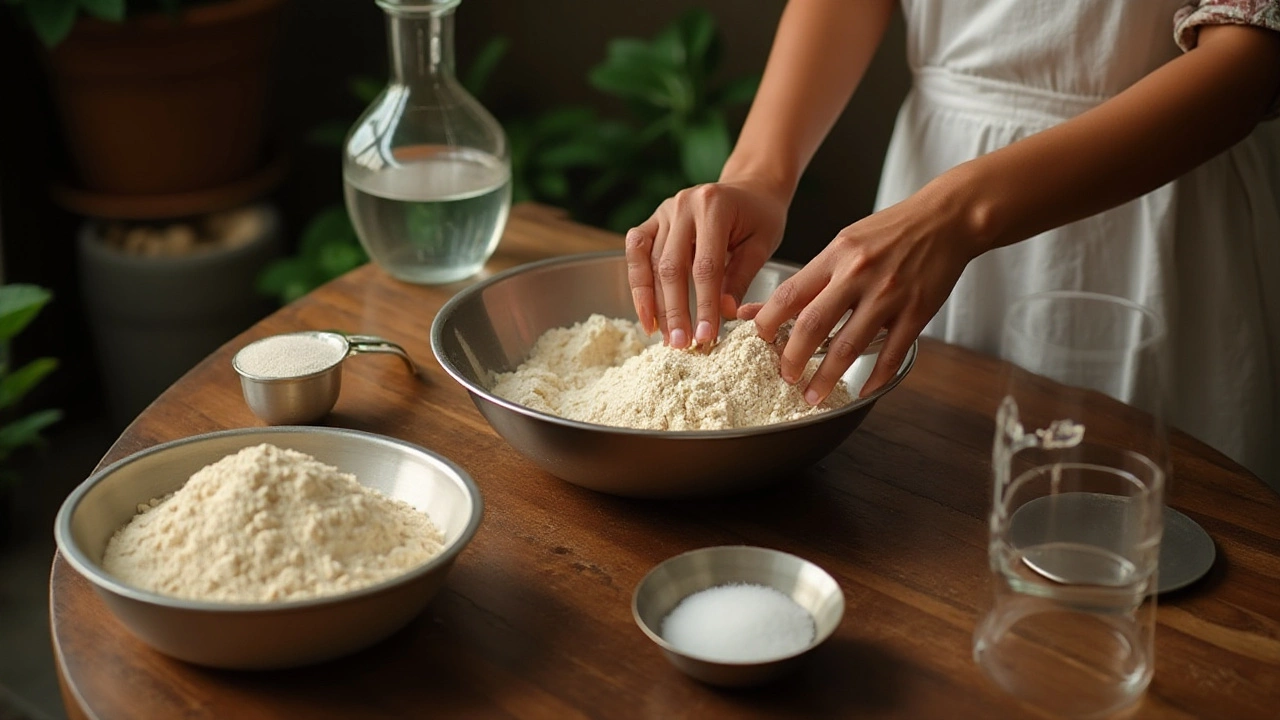
When it comes to achieving a perfectly soft roti, kneading the dough is perhaps the most crucial step in the process. The act of kneading is not just about mixing water with flour; it’s about creating the right texture and elasticity in the dough that will result in a tender and delightful roti. To begin with, ensure your hands and work surface are clean and slightly dusted with flour to prevent sticking. This initial preparation might seem trivial, but it helps maintain the dough’s integrity throughout the kneading process.
Start by mixing your flour and water until it comes together into a shaggy mass. At this point, don’t worry if it looks uneven or messy. The magic happens with consistent kneading. With a firm but gentle hand, begin folding and pressing the dough repeatedly. This action encourages gluten development—a protein network that provides structure to the dough, giving your rotis the strength to puff up beautifully yet remain soft. Experts suggest kneading the dough for at least ten to fifteen minutes.
A well-kneaded dough will feel smooth and elastic to the touch. To test if it’s ready, press a finger gently into the dough. If it springs back with ease, you’ve kneaded it sufficiently. But what about those who find this process tiresome? Many seasoned cooks recommend using the heel of your hand, pressing downwards, folding the dough over, and turning it as you go—a rhythm that, when adopted, makes the task less strenuous.
According to Chef Sanjeev Kapoor, "Kneading is where the roti begins to breathe, where the magic lies in the touch and intention of the hands."
For those who appreciate precision, observing how much water is incorporated can truly affect the softness of the final product. Depending on the type of flour used, the water-to-flour ratio may need to be adjusted. Generally, for every cup of flour, about half a cup of water is a solid starting point, but keep in mind factors such as humidity and flour type can vary this slightly. Some people like to add a tablespoon of oil or ghee during kneading, which can provide additional softness and a richer flavor.
This entire process might appear laborious, yet it is the heart of producing a truly tender roti. Remember, the dough should not be sticky nor too firm—it should have enough give to roll out easily without cracking. As in many culinary practices, consistency and patience are key. Each batch of dough carries with it a bit of experience, a hint of personal touch, capturing the essence of a world beloved staple. By embracing these kneading techniques, you're one step closer to mastering the art of making soft rotis that delight with every mouthful.
Resting the Dough: Why It Matters
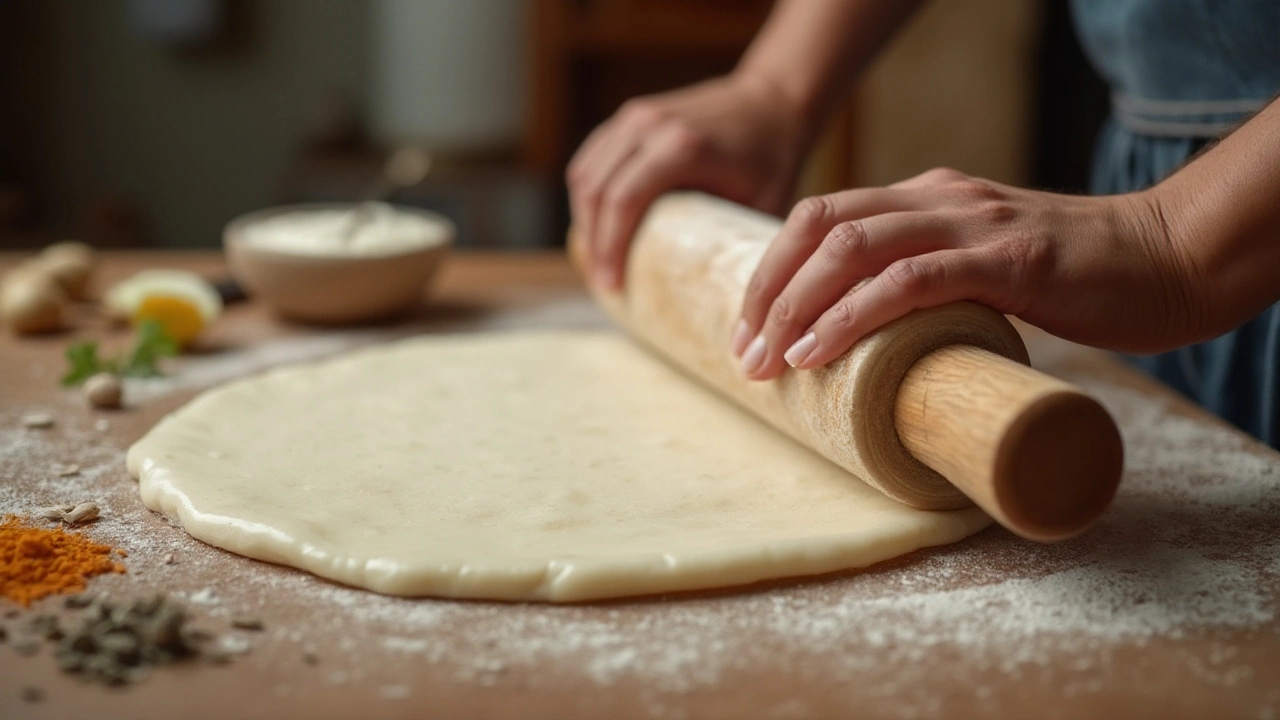
At the heart of creating a soft roti lies a critical step that often gets lost amidst the hustle and bustle of making the perfect meal. Resting the dough is not merely a lull in action but a strategic pause that plays a significant role in achieving those tender, melt-in-your-mouth delicacies. When you allow your dough to rest, you're giving the magic of science a chance to work wonders. The gluten strands within the dough, which are responsible for its elasticity, have the opportunity to relax during this period. This relaxation helps the dough stretch more easily, allowing it to roll out into thinner rotis without bouncing back, ensuring that each one turns out evenly cooked and airy.
In addition to the benefits to the gluten network, resting the dough also allows for better hydration. The flour particles have more time to absorb water, resulting in a slightly softer dough that is less prone to tearing. Many chefs suggest a rest period of at least 30 minutes for optimal results. This adds structure and elasticity and brings about another key aspect: flavor development. As the dough rests, subtle biochemical processes enhance its taste, offering a more profound depth of flavor that can't be rushed. Think of it as allowing the ingredients to get to know each other better, settling into a harmonious balance that is then carried through each bite of your perfectly soft roti.
"Rest fosters repose, enabling magic to unfurl in dough, much like how music transforms mere notes into symphonies," reflects renowned chef Anita Sharma, echoing the sentiment shared by many culinary experts about the importance of patience in cooking.
Now, here's an interesting tidbit: resting isn't confined to a single method. There's a short rest, often done at room temperature, and a long rest, which can be undertaken in the fridge overnight or even longer. Each method has its own merits and depends on how much time you have on hand. A short rest will help to make a softer dough, ideal for hurried dinners, while an extended rest can serve as a time-saving measure for meal preps in advance. Such rests also result in slight fermentation, further enriching the dough's flavor profile.
Practically speaking, incorporating this practice into your roti making journey is simple. After kneading your dough to a smooth consistency, cover it with a damp cloth or plastic wrap. This helps retain moisture and prevents the dough from drying out. If you're planning for a long rest, pop it into the fridge. This method imbues the dough with a slightly tangy taste, akin to a mild sourdough, which can add intrigue to your cuisine. Next time you set out to make rotis, remember this little pause and notice how this seemingly small step bridges the gap between a good roti and the perfect roti.
Resting your dough is indeed an essential step towards culinary excellence, transforming the humble roti into a gastronomic delight. Whether you are catering for a family gathering or simply enhancing your dinner table, never underestimate the quiet power of a resting period. To help visualize this process, consider the following timeline:
| Rest Duration | Effect on Dough |
|---|---|
| 30 minutes | Gluten relaxation, better hydration, easier to roll |
| Overnight | Enhanced flavor, slight fermentation, improved texture |

Perfect Cooking Methods
Cooking soft roti to perfection involves more than just placing it on a hot skillet. The process requires a touch of intuition and timing, alongside an understanding of heat management. Start by preheating a tawa or griddle on medium-high heat. The right temperature is crucial; too hot, and the roti will char on the outside while remaining uncooked within; too cold, and it will dry out, losing its softness entirely. A good tip is to sprinkle a few drops of water on the surface, and if they sizzle immediately, you're on the right track.
Once the skillet is ready, place the rolled-out dough onto it gently. There's a magic to the first flip—wait until you see bubbles forming on the surface, which indicates the bottom has cooked enough to be flipped. Use a spatula to turn the roti. For an airy, puffed roti, lightly press down the center with a clean cloth or spatula, encouraging the steam inside to inflate the bread. Watch as it rises, a moment that fills every cook with satisfaction.
Balancing the heat is important during cooking. Adjust the temperature as needed to maintain that perfect golden color without burning. Many home cooks find that after the first roti, they have to lower the heat slightly to avoid rapid cooking. And for those seeking an added layer of flavor, a brush of ghee or oil post-cooking enhances richness and keeps the roti moist longer.
"The essence of a great roti lies not just in the ingredients, but in the loving precision with which it's cooked," says renowned Indian chef Madhur Jaffrey.
Finally, keep cooked rotis wrapped in a cloth or stored in a container to retain their warmth and softness, a little nest that welcomes each new addition. Some cooks even use insulated containers specifically designed for Indian breads to keep them fresh for longer periods. Mastering these techniques ensures that every roti you serve is a testament to traditional artistry melding with modern-day culinary skill.
Common Mistakes and How to Avoid Them
Making soft roti might seem challenging at times, especially when the results aren't as soft and fluffy as expected. One common mistake involves using the wrong kind of flour. All-purpose flour may seem convenient, but it lacks the necessary gluten required for that perfect stretch and softness. Instead, focusing on whole wheat flour or atta known for its appropriate amount of gluten ensures the desired consistency that remains both tender and durable. It's also worth noting that many forget to sift the flour, removing any clumps or unwanted particles, ensuring a smoother dough.
Another oversight involves improper hydration of the dough. When not using the ideal amount of water, rotis can turn out dry and tough. It's crucial to gradually incorporate water, ensuring the dough remains pliable yet not sticky. A dough that's too dry lacks softness, while a sticky one becomes a chore to roll out. Keep in mind the climate's effect on dough consistency, as moisture levels in the air can influence the amount of water needed. To ensure accuracy, try keeping a measuring cup handy and adjust as needed; getting the dough right is half the battle won.
Kneading, or rather the lack of it, is another pitfall. Shortchanging this process results in uneven texture and harder rotis. Experts advise kneading the dough until it's supple and elastic—approximately 10 to 15 minutes. This activates the gluten, contributing to a soft base. After kneading, resting the dough is equally vital and frequently neglected. Resting, even for just 15 minutes, allows gluten strands the opportunity to relax, resulting in easy rolling and softer rotis.
"Patience is key when it comes to rest, ensuring the magic happens," advises renowned chef Sanjeev Kapoor.
Lastly, the cooking technique plays a pivotal role. Cooking at a low flame might seem safer but can lead to stiff rotis. Conversely, an excessively hot flame could char the exterior while leaving the inside uncooked. A medium-high flame works best, complementing each side with equal heat until slight bubbles form. Pay attention to timing here; letting one side cook for too long can severely affect texture. Flipping too soon, on the other hand, might result in undercooked rotis. Experimenting with your stove's heat settings aids in pinpointing the ideal cooking time, perfecting each batch you make.