
Forget staring at those blocks of shrink-wrapped paneer in your grocery store and wondering if they taste as bland as they look. Making paneer at home is shockingly easy, and the taste? It blows the store-bought stuff out of the water. All you need is milk, a souring agent like lemon juice or vinegar, and something to strain the curds—no fancy gadgets, no weird additives.
The cool part: you can whip up fresh paneer in under an hour, even if you’ve never made cheese before. It’s also a lifesaver if you’re a vegetarian looking to sneak in some extra protein or just want to level up your homemade curries and snacks. You’re fully in control of the texture too, so you can make it super soft for dishes like paneer bhurji, or firm for grilling and tossing into salads.
If you think this sounds intimidating, relax. Once you’ve seen curds instantly pop up from hot milk, you’ll realize how doable this actually is. And yes, you can use that leftover whey liquid—keep reading, because wasting it is a rookie mistake. Ready to get started? Grab a big pot, crank up the stove, and discover why homemade paneer will be your new kitchen flex.
- Ingredients and Tools You Need
- Step-by-Step Paneer Process
- Troubleshooting and Tips
- Ways to Use Fresh Paneer
Ingredients and Tools You Need
Let’s keep this real: homemade paneer doesn’t need any weird ingredients or chef-level gadgets. You’ll probably find everything you need already sitting in your kitchen.
- Milk: Go for full-fat cow’s milk if you want rich, creamy paneer. Skim milk works, but you’ll get a less juicy and crumbly result. Avoid UHT or ultra-pasteurized milk—it won’t curdle well. Fresh, raw milk is the dream, but even regular pasteurized is great.
- Souring Agent: The fastest options are lemon juice, plain white vinegar, or even plain yogurt. Each gives a slightly different flavor. Lemon is classic and light; vinegar works fast and is pretty neutral; yogurt makes the creamiest paneer.
Here’s a quick look at how much milk and souring agent you’ll need for a basic batch:
| Milk (Liters) | Lemon Juice (Tbsp) | Vinegar (Tbsp) | Yogurt (Tbsp) | Yield (Approx. Paneer Grams) |
|---|---|---|---|---|
| 1 | 2 | 2 | 4 | 200 |
| 2 | 4 | 4 | 8 | 400 |
Next, you’ll want to grab these kitchen basics:
- Large heavy-bottomed pot: This stops the milk from burning.
- Ladle or spoon: For stirring and scooping curds.
- Colander or sieve: To drain the whey.
- Cheesecloth or muslin cloth: Absolutely necessary for straining and shaping the paneer.
- Something heavy: A clean pot, a stack of plates, or even a water jug to press out extra whey and firm up the paneer.
- Thermometer (optional): If you like being precise, heating milk to about 90°C (194°F) gives perfect results, but plenty of people just eyeball it.
That’s it. Nothing fancy, nothing hard to hunt down, and all it takes is a few minutes to set everything up for truly fresh, homemade paneer.
Step-by-Step Paneer Process
Here’s how you turn basic milk into a block of creamy paneer without any drama. Honestly, you just need patience and a little attention to heat. If you mess up the timing or measurements, you’ll either end up with rubbery curds or a mess that won’t set at all. This is your go-to method that actually works, every time.
- Boil the Milk. Pour 1 liter (about 4 cups) of whole milk into a heavy-bottomed pot. Bring it to a gentle boil over medium heat, stirring often so it doesn’t catch at the bottom or form a thick skin. No need for fancy milk—plain full-fat does the trick.
- Add the Acid.
- Once it hits a boil, reduce the heat. Stir in 2 to 3 tablespoons of lemon juice or white vinegar, one spoon at a time, while stirring gently. Don’t just dump it all in—you want the separation to happen evenly.
- Within a minute or two, you’ll see the milk split into chunky curds and clear-ish whey. If it looks milky, add a bit more acid until it fully separates.
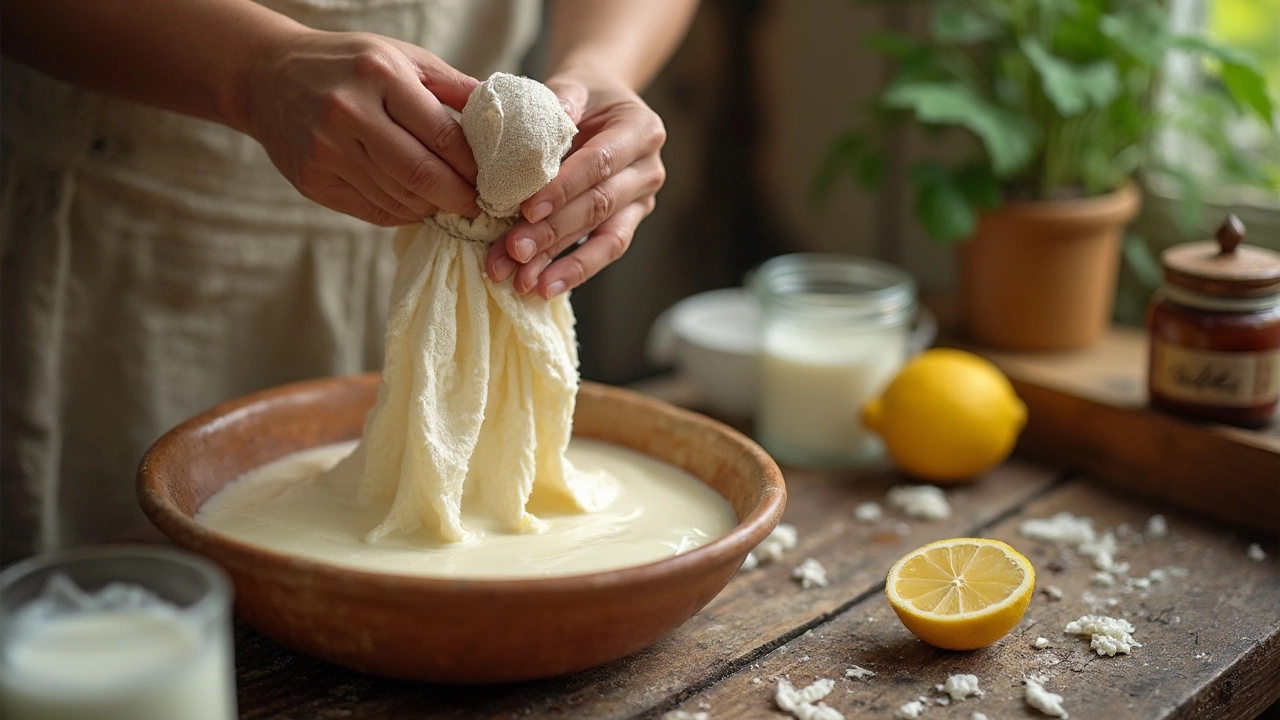
- Strain the Curds.
- Line a colander with a clean muslin, cheesecloth, or even a thin cotton towel. Pour the hot curdled milk right in, letting the whey drain. Watch your hands—the liquid’s hot! Rinse the curds under cold water to get rid of any sour taste from the lemon or vinegar.
- Press and Set.
- Gather the cloth with curds and twist it to squeeze out as much whey as you can. For soft paneer, tie it and hang it for about 30 minutes to let extra liquid drip out. For firmer paneer (think cubes for tikka or stir-frying), shape it into a block, flatten it, and weigh it down with something heavy—like a saucepan with a can inside—for 30 to 45 minutes.
That’s it—you’ve made homemade paneer! For easy reference, here’s a quick stats table that breaks down what you get from 1 liter of milk:
| Milk Used | Average Paneer Yield | Whey Produced |
|---|---|---|
| 1 liter | 150-200 grams | About 800 ml |
Fun fact: that leftover whey is packed with protein—don’t throw it away. Use it in smoothies, knead it into dough, or water your plants with it. Making homemade paneer isn’t just easy, it’s actually pretty efficient.
Troubleshooting and Tips
If your homemade paneer turns out crumbly, rubbery, or just not right, don’t panic — you’re not the only one! Paneer-making is more forgiving than you’d think, but there are a few classic slip ups lots of people run into. Let’s tackle them head-on.
- Milk didn’t curdle: If the milk just won’t separate into curds and whey, usually it’s not hot enough or you didn’t add enough lemon juice or vinegar. Bring the milk just to a boil before adding your acid. If nothing happens in a minute, add a little more souring agent and gently stir.
- Pale, hard paneer: Using ultra-pasteurized milk often leads to rubbery texture because the proteins are already a bit messed up from processing. Stick with whole milk that’s either raw or just pasteurized. Don’t use UHT milk if you can help it.
- Curds too small and fine: This usually means you stirred vigorously after adding acid—resist the urge! Just stir gently once or twice, then leave it alone.
- Paneer doesn’t hold its shape: Not enough pressure while pressing, or too little time under the weight, and you’ll end up with something too crumbly. Try letting it press for at least 30-40 minutes under a decent weight (a heavy pot does the trick).
Here are a couple quick-win tips to make sure your paneer always turns out right:
- Line your strainer with a thin muslin or cheesecloth so you don’t lose any curds.
- Rinse the curds well with cold water before pressing. This gets rid of that extra lemony or vinegary tang that nobody really wants in their curry.
- Save the leftover whey! It’s full of protein and can be added to roti dough, used in rice, or even as a soup base. Seriously — don’t toss it.
- If you want firmer paneer for grilling, use a little extra weight and leave it pressing for an hour—they’ll hold together like a champ.
- For softer paneer (perfect for desserts like rasgulla or sandesh), press it gently for only 10-15 minutes so it stays moist inside.
Want to see how small tweaks make a big difference? Here’s a simple table comparing the outcome based on pressing times and weights:
| Pressing Time | Weight Used | Paneer Texture | Best For |
|---|---|---|---|
| 10-15 min | Light (about 1kg) | Soft, moist | Desserts, bhurji |
| 30-40 min | Moderate (2-3kg) | Firm but tender | Cubes for curry |
| 1 hour+ | Heavy (4-5kg) | Dense, chewy | Grilling, skewers |
And last, don’t be afraid to tweak things. Home kitchens always vary a little. If you run into trouble, just try a small adjustment next batch – nobody nails it every single time, even the pros.
Ways to Use Fresh Paneer
So you’ve got a batch of fresh homemade paneer—now what? Don’t stash it in the fridge and forget it. Fresh paneer is the kind of ingredient that can upgrade almost any meal, from classic Indian dishes to snacks that even picky eaters will love.
- Main Curries: The most popular route is adding chunks of paneer to classic Indian gravies. You can’t go wrong with paneer butter masala, palak paneer (spinach gravy), or shahi paneer (rich, creamy curry). These dishes are mainstays in Indian restaurants for a reason—they’re crowd-pleasers and super satisfying.
- Grilled or Fried Snacks: Slice the paneer into cubes, marinate them with spices and yogurt, then stick them on skewers for paneer tikka. You can also shallow fry blocks for a crispy crust and toss them over salads or rice bowls.
- Stuffed Parathas: Crumble the paneer and mix in chili, coriander, and a pinch of salt for a killer stuffing in parathas. Leftover paneer works perfectly for this and makes a protein-rich breakfast or lunch.
- Desserts: Surprising to some, but paneer is the base for Indian sweets like rasgulla and sandesh. Fresh homemade paneer gives these treats a soft, melt-in-your-mouth texture you just don’t get from store-bought blocks.
If you want to see just how many ways people use paneer, check this out:
| Dish | Prep Time | Calories per Serving* |
|---|---|---|
| Paneer Butter Masala | 30 mins | 380 |
| Paneer Tikka | 25 mins | 290 |
| Palak Paneer | 35 mins | 260 |
| Rasgulla | 60 mins | 150 |
*Calorie estimates are for a typical home-cooked portion.
Here’s a tip: If you only remember one thing, keep in mind that homemade paneer is best eaten fresh. It soaks up sauces better and has a softer texture. If you want to store it, dunk it in a bowl of water and refrigerate—it’ll stay softer for an extra couple of days. Ready to experiment? Just swap it in for tofu or halloumi in your favorite recipes. Trust me, you’ll be amazed by how versatile it can be.